leaderboard 1

Friday, 7 March 2025

How to Diagnose and Fix Common Car Engine Problems

 FIX CAR ENGINE PROBLEMS
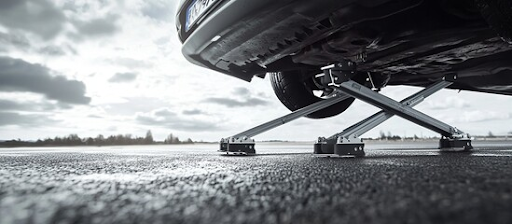
CAR ENGINE 


Your car’s engine is the heart of your vehicle, and when something goes wrong, it can be stressful and costly. However, many common engine problems can be diagnosed and even fixed at home with a little knowledge and the right tools. In this article, we’ll walk you through how to identify and resolve some of the most frequent car engine issues. Whether you’re a seasoned DIYer or a beginner, this guide will help you keep your engine running smoothly.


1. Engine Won’t Start

ENGINE WONT START

Symptoms:

  • The engine cranks but doesn’t start.
  • No sound when turning the key.

Possible Causes:

  • Dead battery
  • Faulty starter motor
  • Fuel system issues

How to Diagnose and Fix:

1.      Check the Battery:

o   Use a multimeter to test the battery voltage. A healthy battery should read around 12.6 volts.

o   If the battery is dead, jump-start the car or replace the battery.

2.      Inspect the Starter Motor:

o   If you hear a clicking sound but the engine doesn’t crank, the starter motor may be faulty.

o   Replace the starter motor if necessary.

3.      Check the Fuel System:

o   Ensure there’s fuel in the tank.

o   Listen for the fuel pump priming when you turn the key to the “on” position. If you don’t hear it, the fuel pump may need replacement.


2. Engine Overheating

Symptoms:

  • Temperature gauge in the red zone.
  • Steam coming from the engine bay.

Possible Causes:

  • Low coolant levels
  • Faulty thermostat
  • Radiator issues

How to Diagnose and Fix:

1.      Check Coolant Levels:

o   Open the radiator cap (when the engine is cool) and check the coolant level. Top it up if necessary.

2.      Inspect the Thermostat:

o   A stuck thermostat can cause overheating. Replace it if it’s not opening and closing properly.

3.      Examine the Radiator:

o   Look for leaks or blockages in the radiator. Flush the radiator if it’s clogged.


3. Check Engine Light On

Symptoms:

  • The check engine light is illuminated on the dashboard.

Possible Causes:

  • Loose gas cap
  • Faulty oxygen sensor
  • Misfiring engine

How to Diagnose and Fix:

1.      Check the Gas Cap:

o   A loose or damaged gas cap can trigger the check engine light. Tighten or replace it.

2.      Use an OBD2 Scanner:

o   Plug in a code reader to retrieve the error code. Common codes include P0420 (catalytic converter) and P0171 (lean fuel mixture).

3.      Address the Issue:

o   Replace faulty sensors or repair the underlying problem based on the error code.


4. Engine Misfires

Symptoms:

  • Rough idling
  • Loss of power
  • Jerking or hesitation during acceleration

Possible Causes:

  • Worn spark plugs
  • Faulty ignition coils
  • Clogged fuel injectors

How to Diagnose and Fix:

1.      Inspect Spark Plugs:

o   Remove and check the spark plugs for wear or fouling. Replace them if necessary.

2.      Test Ignition Coils:

o   Use a multimeter to test the resistance of the ignition coils. Replace any faulty coils.

3.      Clean Fuel Injectors:

o   Use a fuel injector cleaner additive or have the injectors professionally cleaned.


5. Excessive Oil Consumption

Symptoms:

  • Low oil levels between changes
  • Blue smoke from the exhaust

Possible Causes:

  • Worn piston rings
  • Leaking valve seals
  • Oil pan gasket leak

How to Diagnose and Fix:

1.      Check for Leaks:

o   Inspect the engine for oil leaks around the valve cover, oil pan, and seals.

2.      Perform a Compression Test:

o   Low compression in one or more cylinders may indicate worn piston rings.

3.      Replace Worn Components:

o   Replace piston rings, valve seals, or gaskets as needed.


6. Strange Engine Noises

Symptoms:

  • Knocking, rattling, or squealing sounds from the engine.

Possible Causes:

  • Low oil pressure
  • Worn timing belt
  • Damaged bearings

How to Diagnose and Fix:

1.      Check Oil Levels:

o   Low oil can cause knocking sounds. Top up the oil if necessary.

2.      Inspect the Timing Belt:

o   A worn timing belt can cause rattling noises. Replace it if it’s cracked or damaged.

3.      Examine Engine Bearings:

o   Damaged bearings may require professional repair or engine rebuild.


Conclusion:

Diagnosing and fixing common car engine problems doesn’t have to be intimidating. By understanding the symptoms and following these steps, you can save time and money on repairs. Remember, regular maintenance is key to preventing many of these issues. If you’re ever unsure, don’t hesitate to consult a professional mechanic.


The Ultimate DIY Oil Change Guide: Save Money & Keep Your Car Running Smoothly

 DIY Oil Change: Save Money and Extend Your Car’s Life with This Easy Guide

CAR ENGINE OIL CHANGE


Introduction Regular oil changes are essential for keeping your engine in top shape and extending the life of your car. While many people rely on mechanics for oil changes, doing it yourself can save you money and time. This guide will walk you through the entire process, from gathering supplies to safely disposing of old oil.


1. Gather Your Supplies Before you start, you’ll need the following items:

  • Fresh motor oil (check your owner’s manual for the right type and viscosity)

  • New oil filter

  • Oil filter wrench

  • Socket wrench and drain plug socket

  • Oil catch pan

  • Funnel

  • Gloves and rags


2. Prepare Your Vehicle

  • Park your car on a level surface and engage the parking brake.

  • Let the engine run for a few minutes to warm up the oil, making it easier to drain.

  • Turn off the engine and allow it to cool slightly before proceeding.


3. Drain the Old Oil

DRAIN OLD ENGINE OIL 


  • Locate the oil drain plug underneath your vehicle.

  • Position the oil catch pan beneath the drain plug.

  • Use a socket wrench to loosen and remove the plug, allowing the old oil to drain completely.

  • Once drained, replace and tighten the drain plug securely.

old oil removing


4. Replace the Oil Filter

OIL FILTER


  • Locate the oil filter (usually on the side or bottom of the engine).

  • Use an oil filter wrench to loosen and remove the old filter.

  • Apply a thin layer of new oil to the gasket of the new filter before installing it.

  • Hand-tighten the new filter until snug, then turn it an additional ¾ turn.


5. Add New Oil

NEW ENGINE OIL


  • Remove the oil filler cap on top of the engine.

  • Use a funnel to pour in the recommended amount of new oil.

  • Replace the cap and start the engine for a minute to circulate the oil.

  • Turn off the engine and check the oil level using the dipstick, adding more if necessary.


6. Check for Leaks

  • Inspect the drain plug and oil filter for any signs of leakage.

  • Wipe off any spilled oil and ensure all components are securely in place.


7. Dispose of Old Oil Properly

  • Never pour used oil down the drain or onto the ground.

  • Take it to a local recycling center or auto parts store that accepts used oil.


Conclusion Changing your own oil is a simple and cost-effective way to maintain your car’s performance. By following this step-by-step guide, you can keep your engine running smoothly while saving money on routine maintenance.

How to Fix a Car That Won’t Start: A Step-by-Step Guide

 Troubleshooting and Fixing a Car That Won’t Start – Common Causes and Solutions

TROUBLESHOOTING CAR NO START 


Introduction Few things are as frustrating as turning the key in your ignition and hearing nothing—or worse, just a clicking sound. A car that won’t start can be caused by various issues, from a dead battery to a faulty starter. In this guide, we’ll walk you through the common reasons your car won’t start and provide step-by-step instructions to diagnose and fix the problem.


1. Check the Battery A dead or weak battery is one of the most common reasons a car won’t start. Here’s how to check:

CAR BATTERY TESTING


  • Try turning on the headlights. If they are dim or don’t turn on, the battery might be dead.

  • Use a multimeter to check the voltage. A healthy battery should read around 12.6 volts.

  • If the battery is dead, jump-start the car using jumper cables and another vehicle.

  • If the car starts but dies again soon, the alternator might not be charging the battery properly.


2. Listen for Clicking Sounds If you hear a clicking noise when you turn the key, the issue may be with the starter motor or solenoid. Try tapping the starter lightly with a wrench to free it up temporarily, then start the car again.

CAR NO START TROUBLESHOOTING


3. Test the Ignition Switch A faulty ignition switch can prevent power from reaching the starter. To check:

IGNITION SWITCH TESTING


  • Turn the key to the “on” position and check if the dashboard lights come on.

  • Try starting the car in neutral instead of park; a bad neutral safety switch could be the culprit.


4. Inspect the Fuel System If your engine cranks but doesn’t start, there could be a fuel delivery problem. Check for:

CAR FUEL FILTER TESTING


  • A clogged fuel filter

  • A bad fuel pump (listen for a faint whirring sound when you turn the key)

  • Empty gas tank (it happens more often than you’d think!).


5. Examine the Spark Plugs Worn-out or dirty spark plugs can cause engine misfires or prevent the car from starting. Remove a spark plug and check for carbon buildup or excessive wear.

CAR SPARK PLUGS


6. Check the Security System Some modern cars have immobilizers that can prevent the car from starting if the key is not recognized. Try using a spare key or resetting the system.

CAR SECURITY SYSTEM


7. Look for Blown Fuses A blown fuse related to the ignition or fuel system can stop your car from starting. Check the fuse box and replace any blown fuses.

CAR FUSE BOX TESTING


Conclusion A non-starting car can be caused by various issues, but by following these steps, you can diagnose the problem and potentially fix it yourself. If none of these solutions work, it might be time to call a mechanic. Keeping jumper cables and a basic tool kit in your car can also help you be prepared for these situations in the future.

CAR MECHANIC


Top 5 Tools Every DIY Car Repair Enthusiast Should Own

"Must-Have Tools for DIY Car Repairs: Build Your Ultimate Car Repair Toolkit"


CAR REPAIR TOOL KIT

Introduction:

If you’re a car owner who loves tackling repairs and maintenance yourself, having the right tools is essential. Whether you’re changing your oil, replacing brake pads, or diagnosing engine issues, the right tools can make the job easier, faster, and more efficient. In this article, we’ll cover the top 5 tools every DIY car repair enthusiast should own. These tools are must-haves for anyone looking to save money on car repairs and keep their vehicle in top shape. Let’s get started!


1. Socket and Wrench Set


CAR DIY TOOL SOCKET AND WRENCH


Why It’s Essential:
A socket and wrench set is the backbone of any car repair toolkit. From loosening bolts to tightening nuts, this versatile tool is used in almost every repair job.

What to Look For:

  • Size Range: Look for a set that includes both metric and standard sizes, as cars use a mix of both.
  • Durability: Choose high-quality, chrome-vanadium steel sockets and wrenches for long-lasting performance.
  • Ratchet Handle: A good ratchet handle with a comfortable grip will make your job much easier.

Common Uses:

  • Changing tires
  • Replacing brake pads
  • Removing engine components

Pro Tip:
Invest in a set with a 
torque wrench
 for precise tightening of bolts, especially for critical components like lug nuts and engine parts.


2. Jack and Jack Stands

CAR JACK STAND


Why It’s Essential:
A jack and jack stands are crucial for lifting your car safely to access the undercarriage. Never rely on just a jack—always use jack stands for added safety.

What to Look For:

  • Weight Capacity: Ensure the jack and stands can support your vehicle’s weight. Most cars require a minimum of 2 tons.
  • Ease of Use: Hydraulic floor jacks are easier to operate than scissor jacks.
  • Stability: Look for wide bases on jack stands for better stability.
VARIOUS TYPES OF CAR JACK STANDS

CHOOSE RIGHT STAND AS PER YOUR VEHICLE.

Common Uses:

  • Changing oil
  • Inspecting the undercarriage
  • Replacing exhaust systems

Pro Tip:
Always place your car on a flat, solid surface before lifting it. Use wheel chocks to prevent the car from rolling.

CAR LIFTING ON JACK STAND


3. Oil Filter Wrench

CAR OIL FILTER


Why It’s Essential:
Changing your car’s oil is one of the most common DIY maintenance tasks, and an oil filter wrench makes removing the old filter much easier.

OIL FILTER AND WRENCH TOOL


What to Look For:

  • Adjustability: Choose an adjustable wrench that fits different filter sizes.
  • Grip: Look for a wrench with a non-slip grip to avoid stripping the filter.

Common Uses:

  • Changing oil and oil filters

Pro Tip:
Apply a thin layer of new oil to the gasket of the new filter before installing it. This ensures a proper seal and makes future removal easier.

INSTALLING NEW OIL FILTER


4. Multimeter

CAR MULTIMETER TESTING 


Why It’s Essential:
Electrical issues can be tricky to diagnose, but a multimeter makes it easier. This tool measures voltage, current, and resistance, helping you pinpoint electrical problems.

MULTIMETER


What to Look For:

  • Auto-Ranging: Auto-ranging multimeters are easier to use, especially for beginners.
  • Durability: Look for a rugged, drop-resistant design.
  • Backlit Display: A backlit display is helpful for working in low-light conditions.

Common Uses:

  • Diagnosing battery issues
  • Testing alternator output
  • Checking fuses and wiring
CAR FUSE TESTING WITH MULTIMETER TOOL


Pro Tip:
Always disconnect the battery before working on your car’s electrical system to avoid short circuits or shocks.


5. Code Reader (OBD2 Scanner)

CAR OBD2 ERROR CODE READER


Why It’s Essential:
Modern cars are equipped with an onboard diagnostics system (OBD2) that monitors the vehicle’s performance. A code reader allows you to access this system and diagnose issues.

CAR OBD2 TOOL TESTING


What to Look For:

  • Compatibility: Ensure the scanner is compatible with your car’s make and model.
  • Ease of Use: Look for a scanner with a clear display and simple navigation.
  • Advanced Features: Some scanners can read live data, reset maintenance lights, and even perform emissions tests.

Common Uses:

  • Diagnosing check engine lights
  • Reading and clearing error codes
  • Monitoring fuel efficiency
OBD2 TOOL SCANNING ERROR CODE


Pro Tip:
Keep your code reader in your glove compartment. It’s a handy tool to have if your check engine light comes on while you’re on the road.


Bonus Tool: Screwdriver Set

SCREWDRIVER SET

While not as specialized as the tools above, a good screwdriver set is indispensable for various car repairs. Look for a set with both flathead and Phillips heads in multiple sizes.


How to Build Your DIY Car Repair Toolkit

CAR DIY TOOL FOR FOR EMERGENCY REPAIR ON THE GO


1.      Start Small: Begin with the essentials like a socket set, jack, and screwdrivers.

2.      Add Tools as Needed: Invest in specialized tools like an oil filter wrench or multimeter as you take on more advanced repairs.

3.      Organize Your Tools: Use a toolbox or tool chest to keep your tools organized and easily accessible.


Conclusion

Having the right tools is the first step to becoming a successful DIY car repair enthusiast. With these top 5 tools, you’ll be well-equipped to handle most common car repairs and maintenance tasks. Not only will you save money on labor costs, but you’ll also gain a deeper understanding of how your car works. So, stock up your toolkit and start tackling those repairs with confidence!